Develop revenexx Storefronts
Rendering strategies
revenexx allows you to host both statically-generated and server-rendered storefronts.
Static sites are storefronts that are pre-built and served as-is to clients. They do not execute server-side code on each request. They are ideal for use-cases such as Single Page Applications (SPAs), documentation sites, personal blogs, and portfolio storefronts.
Server-side rendered (SSR) sites generate content dynamically on the server and send fully rendered pages for each request. They are ideal for use-cases with substantial dynamic content or server-side processing such as e-commerce platforms, social media applications, content management systems (CMS), and real-time collaboration tools.
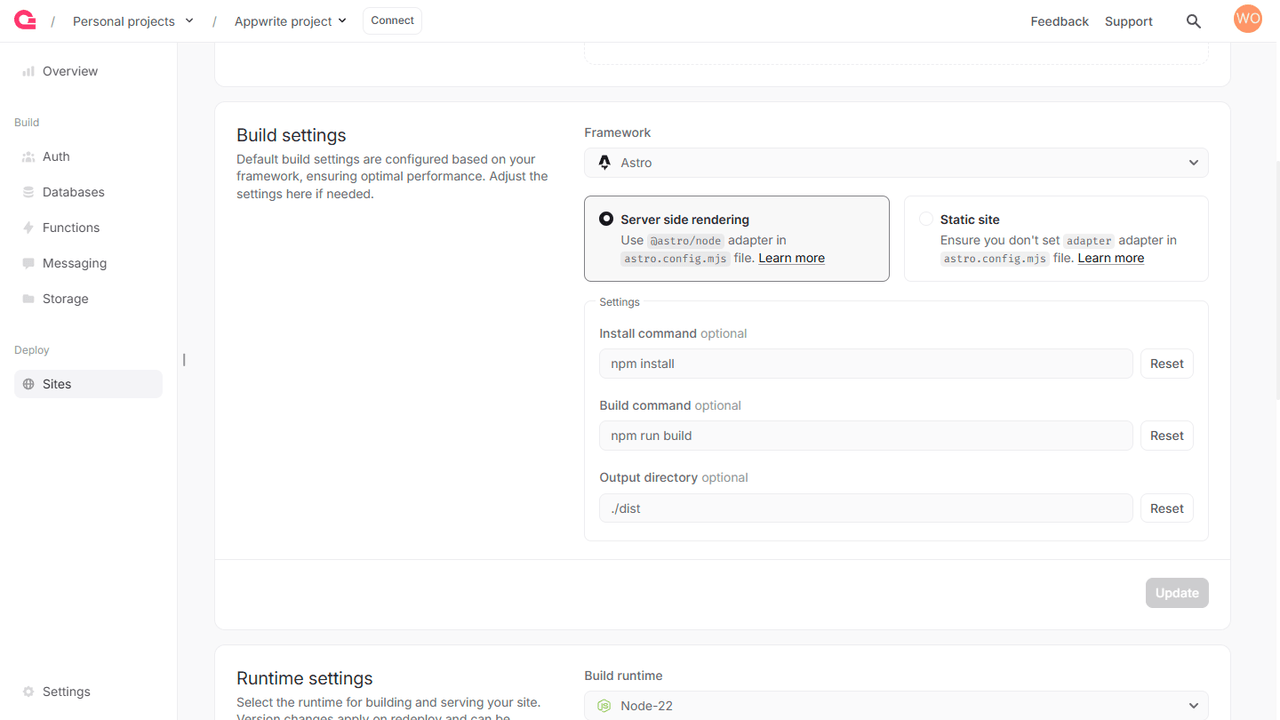
You can configure your preferred rendering strategy through the following steps:
- Navigate to your storefront on revenexx Console.
- Head to the Settings tab > Build settings section.
- Select the SSR or the Static checkbox.
- Confirm that the appropriate install command, build command, and output directory are set.
- (For SPAs) Add a fallback file.
- Click on the Update button and redeploy your storefront.
Accessing environment variables
revenexx Storefronts lets you set static environment variables to pass constants and secrets such as API keys, connection strings, etc., to your storefronts.
To set static environment variables, follow these steps:
- Navigate to your storefront on revenexx Console.
- Head to the Settings tab > Environment variables section.
- Click on the Create variable button and add the key and value of the environment variable.
- Select the Secret checkbox if you want to prevent any team member from reading the value of the environment variable after creation.
- Click on the Create button and redeploy the storefront.
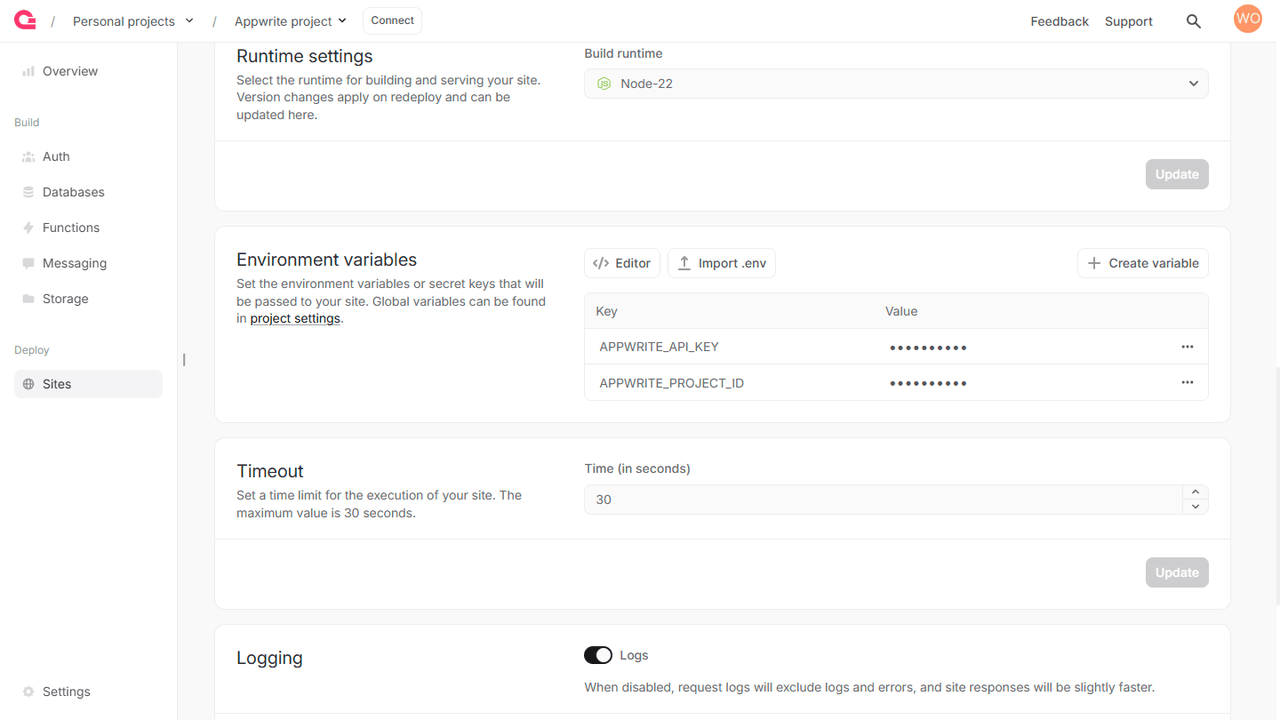
You can also configure global variables that apply to all your storefronts in the Settings of your project.
Secret environment variables
revenexx now allows you create secret environment variables, which are hidden from both the revenexx Console and API. Once a variable is marked as secret, this action cannot be reversed.
You can mark an environment variable as secret either at the time of creation or after it is created.
revenexx-specific environment variables
revenexx passes the following environment variables into every deployed site by default.
| Variable | Description | Available at Build and/or Run Time |
|---|---|---|
REVENEXX_SITE_API_ENDPOINT | The API endpoint of the running site | Both |
REVENEXX_SITE_NAME | The name of the running site. | Both |
REVENEXX_SITE_DEPLOYMENT | The deployment ID of the running sites. | Both |
REVENEXX_SITE_PROJECT_ID | The project ID of the running site. | Both |
REVENEXX_SITE_RUNTIME_NAME | The runtime name of the running site. | Both |
REVENEXX_SITE_RUNTIME_VERSION | The runtime version of the running site. | Both |
REVENEXX_SITE_CPUS | The CPU (runtime) specification of the running site. | Both |
REVENEXX_SITE_MEMORY | The memory (runtime) specification of the running site. | Both |
Timeouts
Each request made to a path on an revenexx Storefront has a set time limit, after which the request will timeout. Here are the steps to configure those timeout period:
- Navigate to your storefront on revenexx Console.
- Head to the Settings tab > Timeout section.
- Add an appropriate time limit (in seconds).
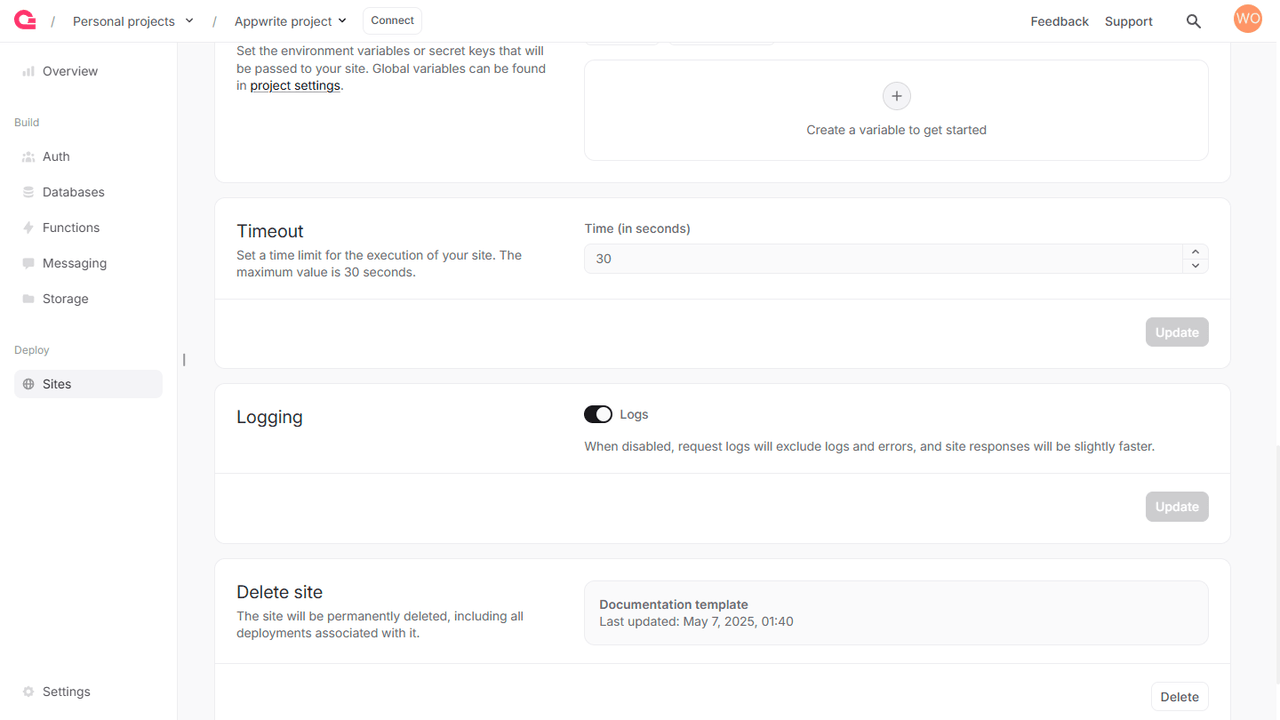
The default timeout is set at 15 seconds and the maximum value possible is 30 seconds.
Resource limits
Under Settings - Resource limits, you can set build and runtime specifications independently. The build spec applies while dependencies are installed and your storefront is built for deployment; the runtime spec applies when your storefront serves traffic, including server-side rendering (SSR). Both use the same CPU and memory tiers on Cloud.
On Revenue Cloud, customizing specifications requires the Pro plan. See Compute for tiers, GB-hours, and pricing.
Project dependencies
To install your dependencies before your storefront is built, you should add the relevant install command to your storefront’s build settings. Here are the steps to add the install command:
- Navigate to your storefront on revenexx Console.
- Head to the Settings tab > Build settings section.
- Confirm that the appropriate install command is set.
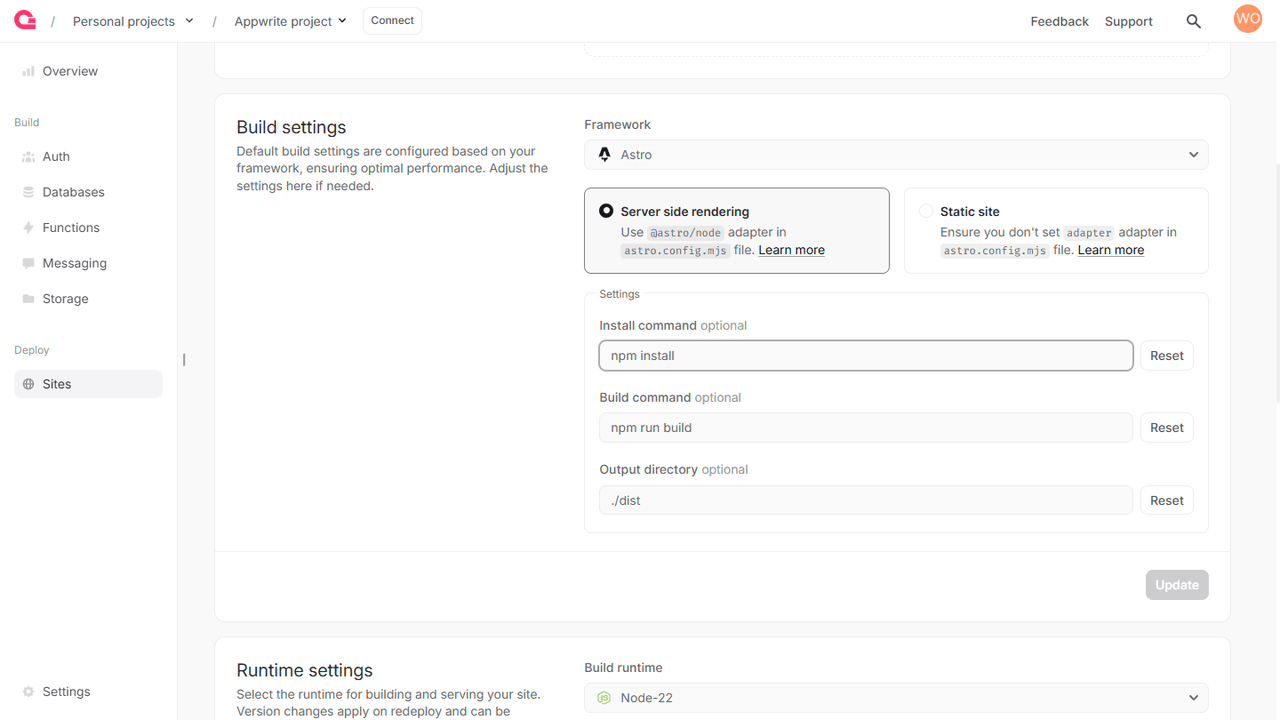
Make sure to include dependency files like package.json in your storefront's configured root directory. Do not include the dependency folders like node_modules in your storefront’s root directory. The dependencies installed for your local OS may not work in the storefront's environment.
Your site's dependencies should be managed by the package manager of each language. We include the following package managers and setup commands by default.
| Framework | Default package manager | Install command | Build command | Output directory |
|---|---|---|---|---|
| Next.js | npm | npm install | npm run build | ./.next |
| Nuxt | npm | npm install or yarn install | npm run build or yarn build | ./.output |
| SvelteKit | npm | npm install | npm run build | ./build |
| Angular | npm | npm install | npm run build | ./dist/angular/browser |
| Astro | npm | npm install | npm run build | ./dist |
| Remix | npm | npm install | npm run build | ./build |
| TanStack Start | npm | npm install | npm run build | ./dist |
| Flutter | pub | flutter pub get | flutter build web --release -t lib/main.dart | ./build/web |
| React Native | npm | npm install | npm run build | ./dist |
| Other JavaScript | npm | (Empty) | (Empty) | ./ |